A well-maintained ceiling is vital to a comfortable, functional space. Regular inspections can catch small cracks, stains and plaster damage before they become more serious problems.
When repairing a ceiling, first make sure the area is clean and dry to prevent mold or mildew. Next, set up adequate lighting and secure your stepladder. Click the Ceiling Repair Perth to learn more.
Drywall is a common building material, but because it’s so thin it is susceptible to damage. There are several signs that drywall repair or replacement may be needed. These include small holes, cracks, and water damage. It’s important to take the time to do regular visual inspections of your drywall, and address any damage promptly.
Often, small holes in drywall need to be patched rather than replaced. These can be done using a drywall patch kit. This includes the patch, drywall tape, and sandpaper. The patch is then secured to the wall, and the edges are smoothed with sandpaper to blend into the surrounding wall. A lightweight joint compound is then spread over the entire patch, and is sanded down to a smooth finish. Finally, a coat of paint is applied to match the existing color of the wall.
Larger holes or cracks in drywall are more difficult to repair than smaller holes. For larger holes, a backing board needs to be attached to the damaged area. This can be done with a drywall saw or a utility knife. Once the backing board is secure, a new piece of drywall is cut and inserted into the hole. The edges are then taped and smoothed, and a coat of joint compound is applied. This must be sanded down to a finish before painting.
Water and mold damage are more serious issues that require professional drywall repair or replacement. These can be caused by leaks around windows, doors, or appliances, as well as flooding, rot, or pests. It’s also important to keep humidity levels low, and use dehumidifiers and exhaust fans in basements to prevent moisture-related issues.
Whether your drywall is in need of minor or major repairs, Larry’s Lumber has the tools and supplies you need. Contact us today to get started! We carry a wide range of products, including drywall and insulation, power tools, paint touch up, lumber, and much more. You can trust our experienced team to provide you with the quality materials and professional service you need for your home repair or construction projects.
Patching Cracks
If your home has cracks in its ceiling, a few simple steps can repair them before they worsen. Minor cracks are the result of house settling and can be patched with drywall mud, while more significant ones may indicate a serious issue that needs to be addressed before proceeding with ceiling repairs. For example, water stains on the ceiling are often the telltale sign of a leak that should be addressed before attempting to patch the cracks in your ceiling.
Before starting to make your drywall repairs, set up adequate lighting and carefully position a step ladder so that you can work safely on the ceiling without risking falls or other injuries. It is also a good idea to lay down a tarp or drop cloth on the floor in front of the area where you will be working to catch any paint chips or other debris that might fall during the project.
Start by scoring the crack with a utility knife, creating a shallow cut. This will help prevent you from accidentally stripping the paper face off the undamaged drywall during the patching process. Cover the crack with mesh tape and apply a thin coat of joint compound over the tape. Once dry, sand the crack smooth.
Once the drywall patch is smooth and sanded, you will need to prime and paint it to match the ceiling color. Choose a water-based primer that is compatible with your existing ceiling paint and apply it using a brush or roller. Be sure to roll the primer well over the entire patched surface to ensure full coverage and prevent the crack from showing through once it is painted.
Repeat the process for the second and third coats of drywall compound, sanding between each application to make it as smooth as possible. Finally, once the drywall patch is smooth and the rest of your ceiling is primed and painted, you will be able to enjoy a more even look throughout your living space.
Patching Holes
If the damage is to a small area and not structurally sound, you can use a spackle that matches your ceiling’s color to make it look seamless. However, larger holes or snags may require additional steps for a sturdy repair. You can purchase a self-adhesive patch that is easy to install, or you can make your own using drywall tape and setting compound. You can also use ready-mixed joint compound, but it takes longer to dry. In either case, you should use a utility knife to clean around the edges of the hole and smooth it out to blend with the rest of the surface.
If your drywall is damaged by a large hole, you need to create a new patch that can support the weight of the ceiling and prevent future problems. Cut a piece of new drywall that is slightly larger than the existing hole. Apply a strip of drywall tape around the perimeter of the patch to hold it in place. You can use a pre-mixed joint compound for this, but freshly mixed mud will provide the best results. Fill the hole with a thin coat of the setting-type compound and feather it out over the old drywall to ensure a seamless transition. Let the compound dry, sand and paint.
For large holes, you can purchase a drywall patch kit that will contain the tools you need as well as a mesh patch for your repair. You can also use a piece of drywall scrap purchased at a home improvement store to make the patch yourself. If you’re using a homemade patch, use a utility knife to cut a square slightly bigger than the hole. You’ll need to remove the drywall’s corner bead, if present, before placing the patch.
A stud finder will help you locate the studs on both sides of your damaged area. Draw a line with the stud finder from each edge of the hole to the closest wall stud. Using the drywall saw, cut along these lines until you reach a stud. You can then use a utility knife to break up any drywall that remains to expose the stud. If the stud is damaged, you can cut it out with your drywall saw and then attach a new patch to the wood-backed stud.
Painting
A fresh coat of paint can dramatically change the look and feel of a room. It can convey a feeling of warmth and openness, or an aura of opulence and grandeur. However, painting ceilings can be a tricky project, requiring specialized tools and techniques for a smooth, even finish. Having a qualified professional take care of this type of work ensures that the finished product looks its best.
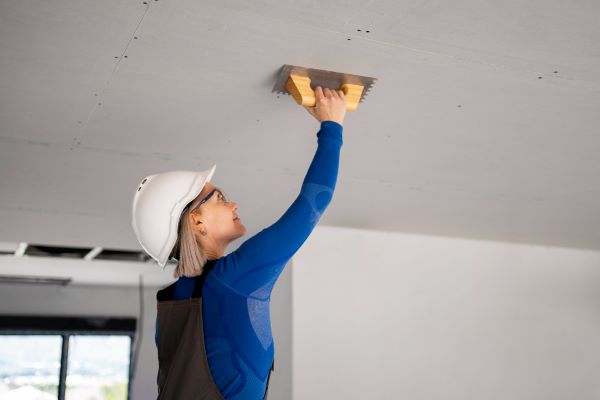
Before beginning a ceiling-painting project, clear the space of furniture and cover floors with drop cloths or plastic sheeting. Inspect the surface for cracks and dents, patch them, and sand it to prepare for painting. If the ceiling has a texture, it will need to be skim-coated with joint compound before proceeding to paint. Skim-coating resurfaces old drywall or plaster and makes it ready to be painted. It also covers any water stains that are a result of leaky roofs or plumbing.
Skim-coating requires patience and thorough sanding between coats. It is important to let the first coat dry completely before applying the next one. It is also a good idea to work in small sections, completing each section before moving on to the next. This helps prevent visible seams and allows for more even drying. It is also wise to use a high-quality ceiling paint, as it hides imperfections better than a standard wall-paint sheen.
Some homeowners choose to paint the ceiling and walls the same color, a technique known as “color drenching.” While it is more difficult to do than simply painting each surface a different color, it can make the room appear larger and create a uniform look that’s cohesive and pleasing to the eye.
Although a regular visual inspection can help identify problems such as water stains and cracks, it’s a good idea to have an experienced contractor conduct a more thorough annual inspection of the entire ceiling structure. This type of inspection can identify potential structural issues before they become serious and costly, such as sagging or collapsed areas. It can also identify the source of leaks and recommend any needed repairs before they worsen.